Fun with Software - The Crab Nebula
Most amateur astronomers attempt to get good pictures M1. There is plenty of detail in the nebula and the pulsar can be detected in most images.
Fifty light frames, 60 seconds each, were taken through a photometric R filter with an ST-7E and an 8” LX200 at f/10. Nine dome-flats were taken at the end of the run. 50 dark frames and 100 bias frames were taken during a previous session. The exposures are short (60 s) because the telescope was un-guided.
The raw frames were corrected using the master flat and dark frames. The master flat frame was used with a master bias frame to create a bad pixel map which was then used to clean up the corrected frames.
The corrected and cleaned frames were aligned and stacked using IRAF in order to quickly find the best frames. Frames with obvious guiding problems were removed from the list.
|
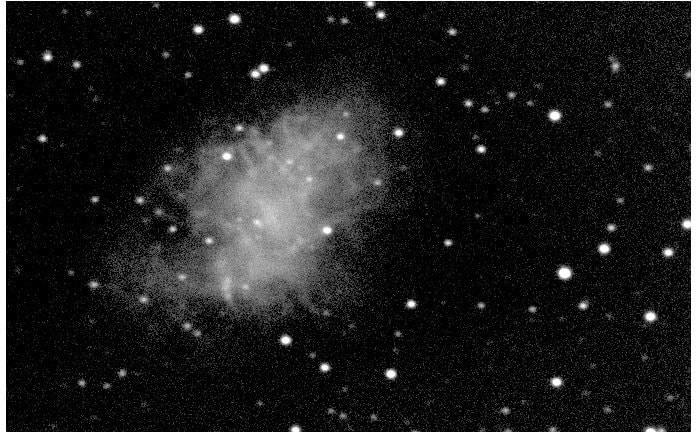
’imwcs’ from WCS Tools was used to apply a plate solution to each of the ’good’ frames. Swarp, from Astromatic,was used to combine the images. Due to poor seeing and the tracking of the telescope, only 24 of the 50 frames were used.
This image was then cropped and the background subtracted using ’imsurfit’. |
|
|
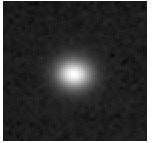
The ’lucy’ task from the STSDAS package was used to deconvolve the image. A star from the image was used as the PSF.
This is the kind of software used to correct the Hubble Space Telescope images before they installed COSTAR. |
|
|
In order for the task to work properly, the following requirements must be met:
|
|
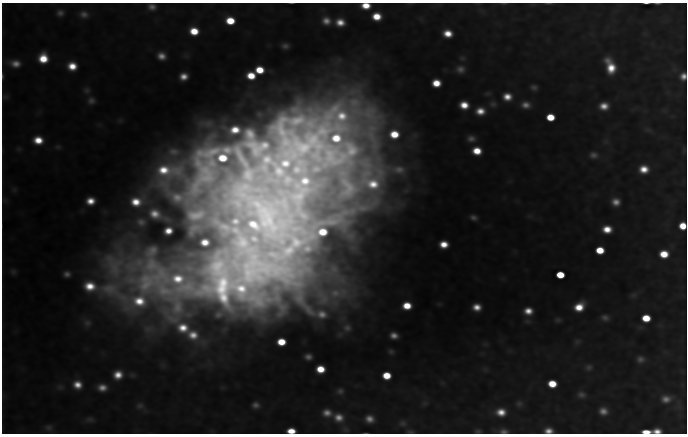
Comparison before and after clearly shows the improvement in the image. The stars are a little tighter and some of the grain has gone away. There’s a slight ’donut’ around some of the stars in the nebula, but not too extreme.
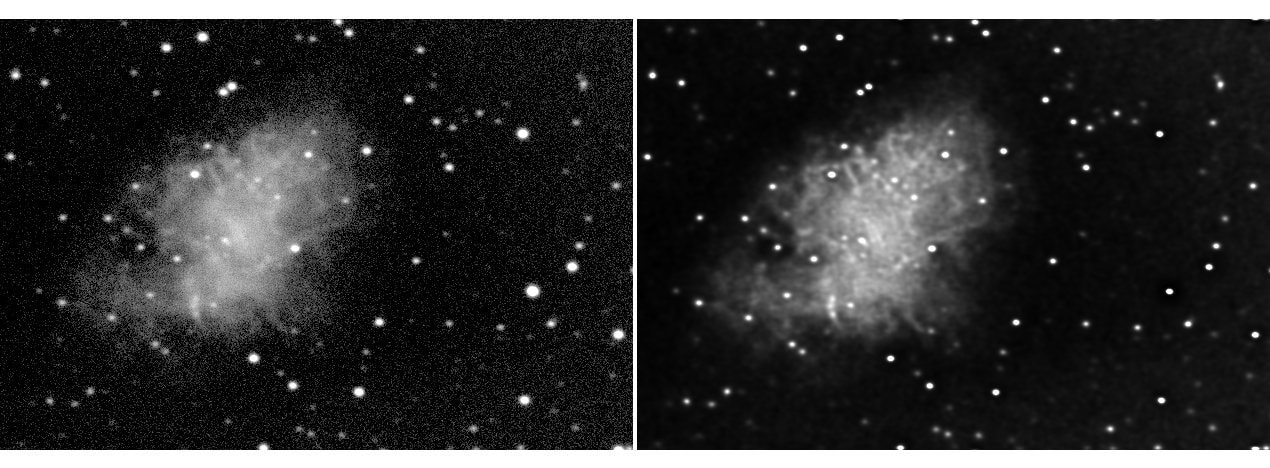
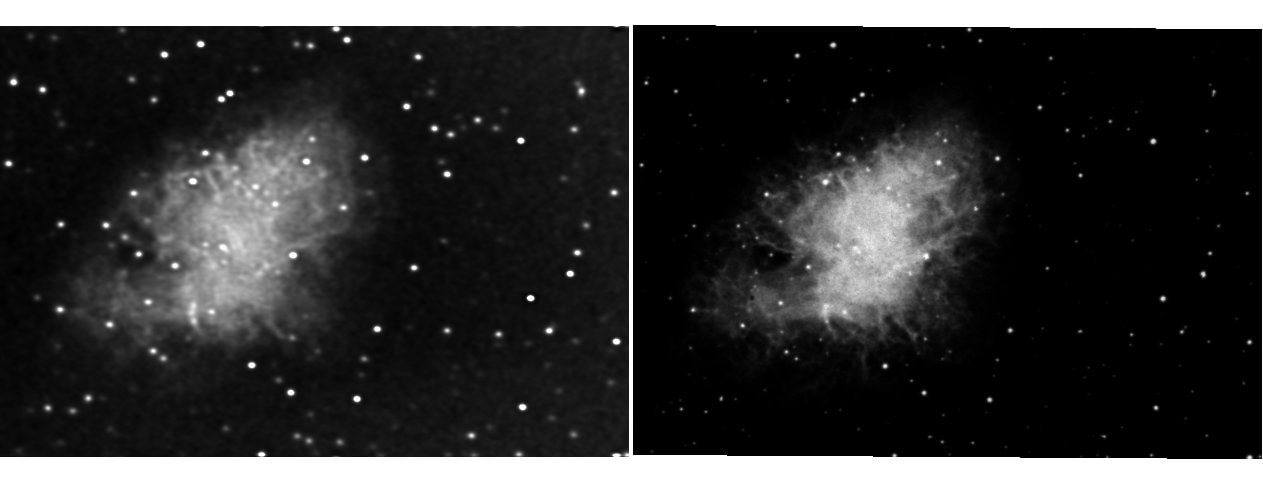
DS9 can be used to download a comparison image from the STSCI DSS database. The image shows general agreement with the detail in the DSS image on the right. The DSS image was taken with a larger telescope, so the stars are much smaller.
All the software I used for this is free. It's been used at the big observatories for many years so it's well tested.
